
Easy Charcuterie Board 101

Comments
This Post May Contain Affiliate Links. Please Read Our Disclosure Policy
Hey friends! Ashley here. I’m excited to share one of my favorite things to make when I have people over — the charcuterie board. I’m convinced that whoever decided to pile fancy meats, cheeses, and snacks onto a wooden board was a pure genius — because there is zero cooking involved, it feeds a crowd beautifully, and somehow people always think you spent way more time on it than you actually did.
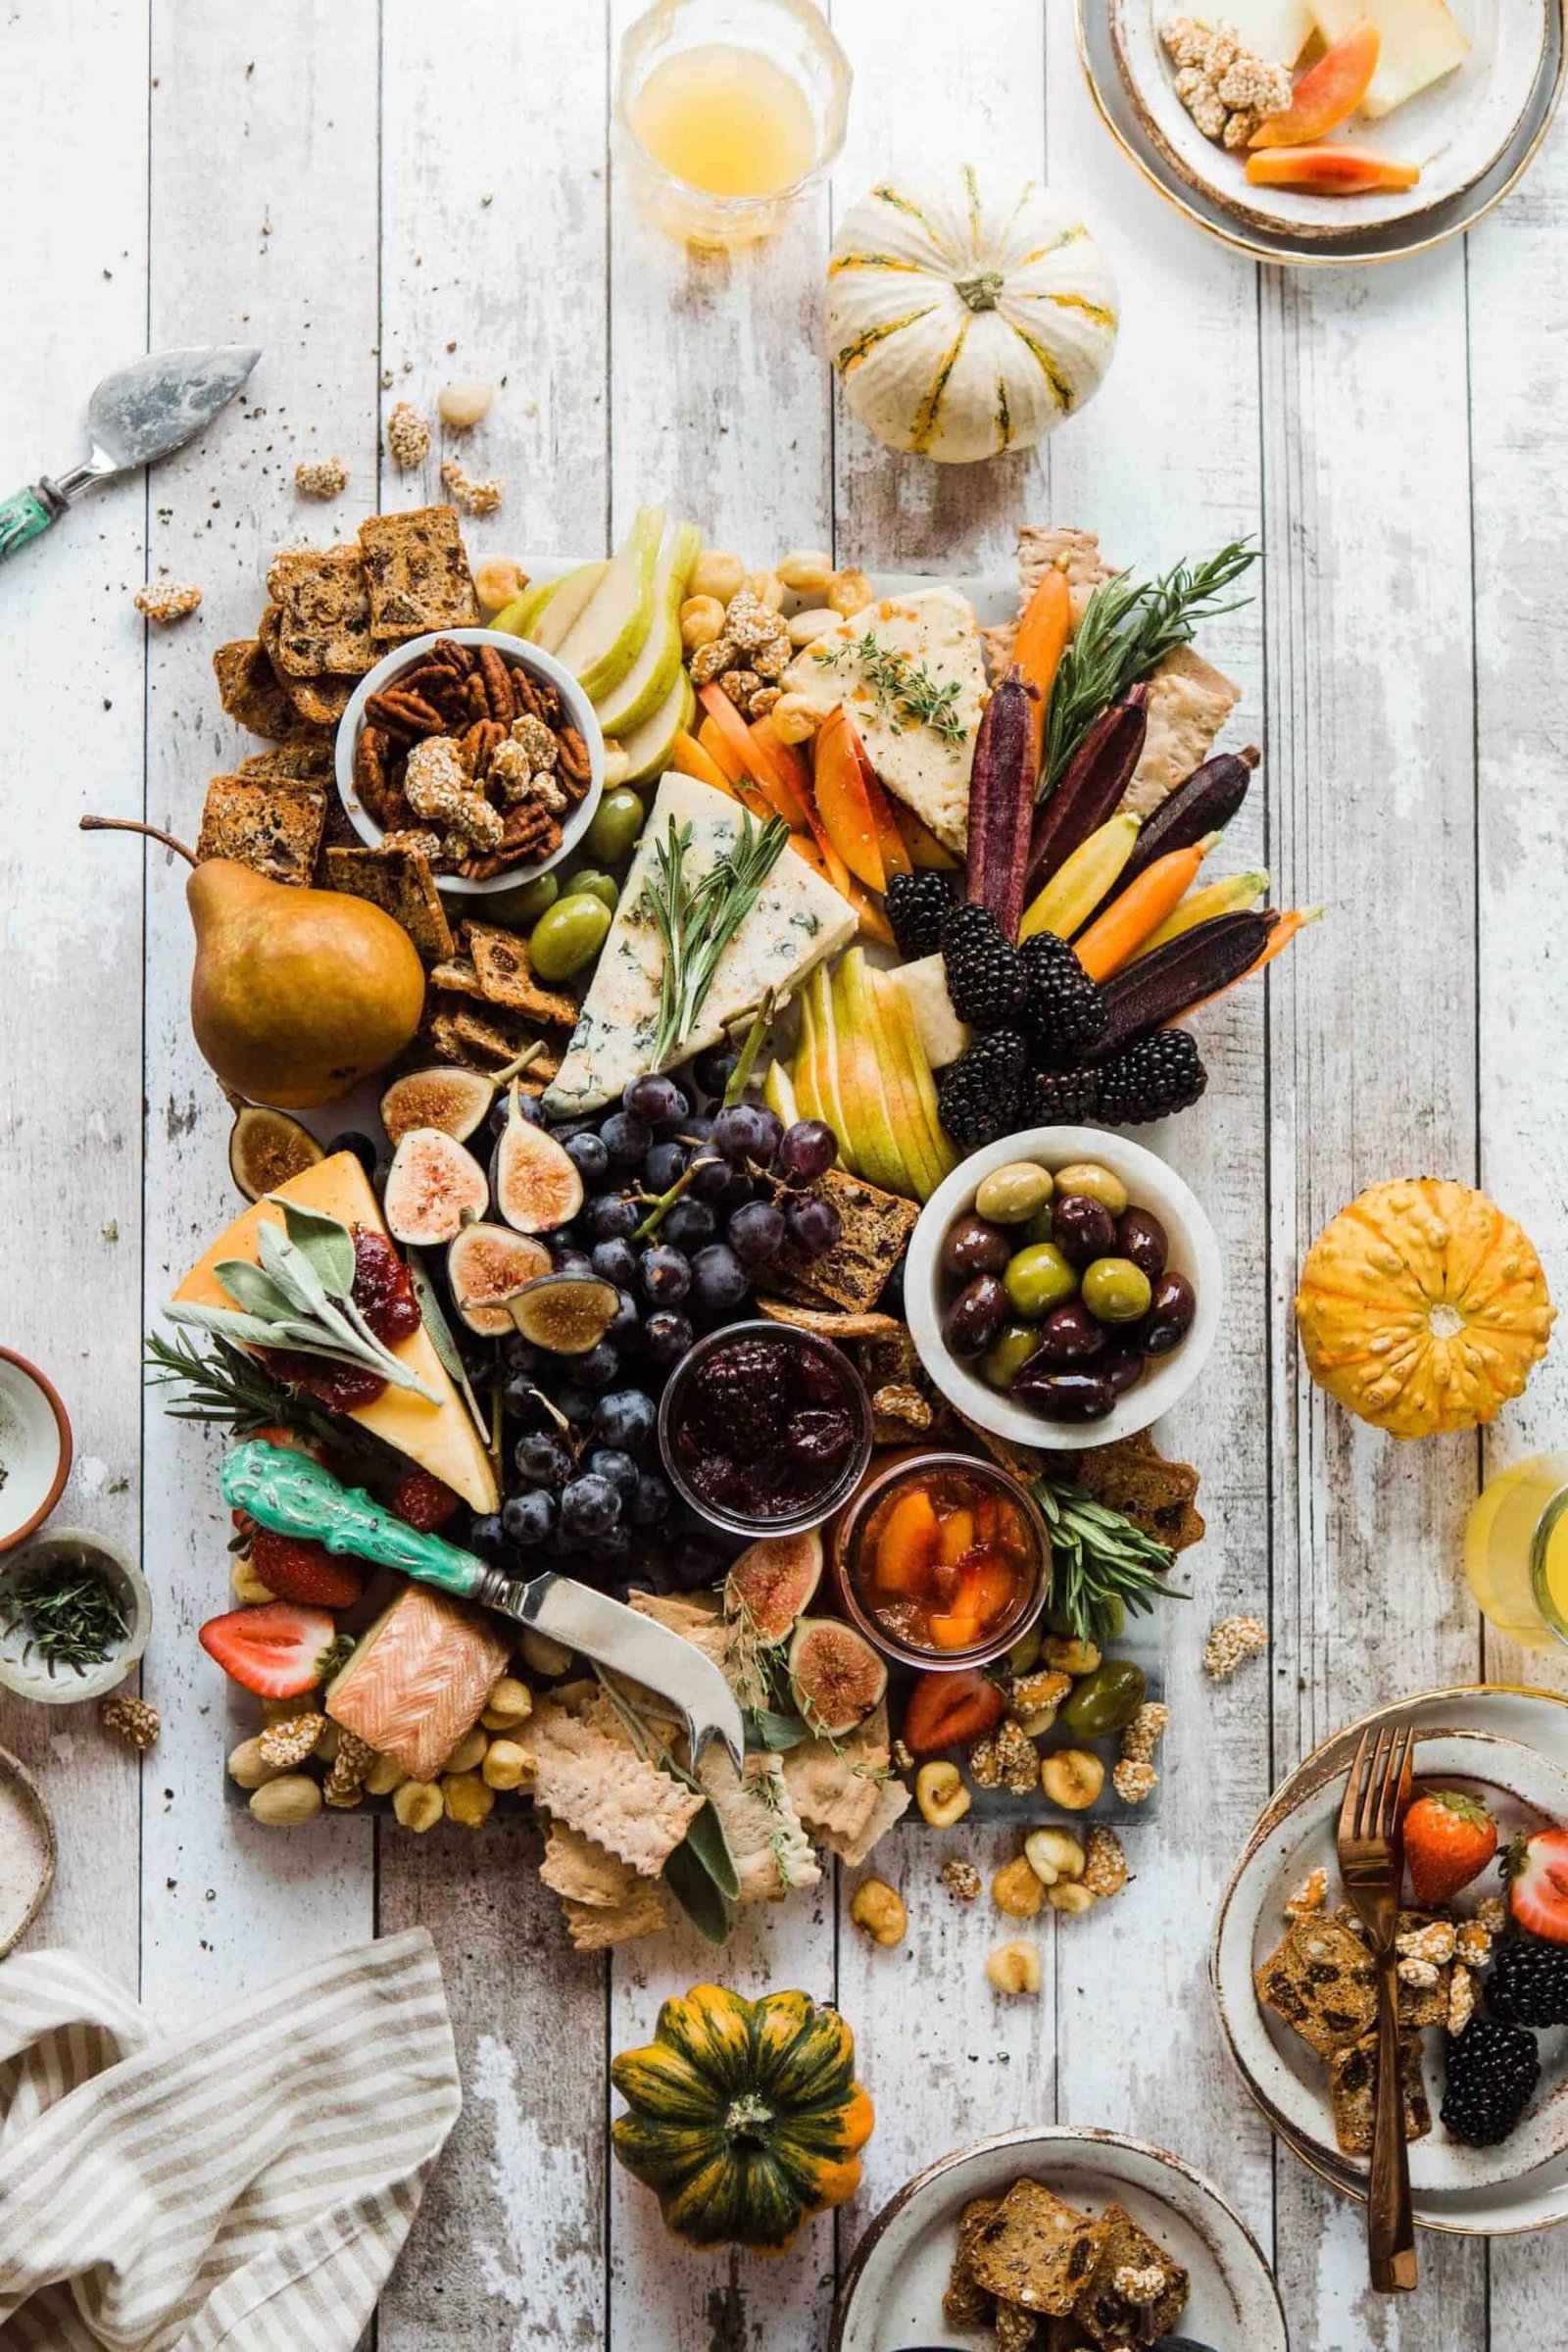
Why You’ll Love This Charcuterie Board
- Zero cooking required: just unwrap, slice, and arrange
- Tip: Totally customizable for any taste, diet, or occasion
- A guaranteed crowd-pleaser: even the pickiest eaters find something to love
- Tip: Scales easily from a small family snack to a full party centerpiece
- Looks like you spent hours: ready in 15 minutes flat
Honestly, the hardest part of making a charcuterie board is deciding what to buy at the grocery store. Once you have your ingredients home, the whole thing comes together in minutes. And the leftovers? Absolute chef’s kiss. I have been known to stand in front of the open fridge the next morning, picking at leftover cheese and crackers for breakfast with zero regrets.
What Goes on a Charcuterie Board?
Here is the thing about charcuterie boards — there are no real rules. But there IS a framework that makes every board look and taste incredible, and it comes down to five key building blocks: meats, cheeses, crackers, fresh fruits and veggies, and extras. Get all five categories on your board and you genuinely cannot go wrong.
The meats are the stars of the show! You want two or three different cured meats for variety in flavor and texture. My absolute go-tos are salami, prosciutto, and pepperoni — they are easy to find at any grocery store, universally loved, and look gorgeous when folded or fanned out on the board. For a board serving 8–10 people, plan on about 3–4 ounces of each meat. Pro tip: fold salami slices in half, then in half again to create little cups — they hold their shape beautifully and look incredibly professional with almost zero effort.
A great charcuterie board needs at least two or three types of cheese with contrasting flavors and textures. My classic trio is a sharp hard cheese (like aged cheddar or manchego), a creamy soft cheese (like brie or camembert), and a semi-firm option (like smoked gouda or havarti). Pull your brie out of the refrigerator about 30 minutes before serving so it softens up to that perfectly spreadable, oozy consistency — trust me, it makes a huge difference. Slice about half your cheeses in advance and leave one block whole for guests to cut themselves. It looks more rustic and inviting, and honestly takes less work on your end!
You need a vehicle for all that delicious cheese and meat! I always include two types of crackers — a plain water cracker and a buttery or herb-seasoned cracker — so guests have options depending on what they are pairing them with. A sliced baguette or a few breadsticks add height and texture variation that makes the whole board look more abundant and impressive. Arrange crackers in neat fans or rows, and do not be afraid to let them spill slightly off the edge of the board — it gives everything that gorgeous, overflowing look.
This is where your board gets its color, freshness, and natural sweetness! Red grapes are my absolute favorite — they are beautiful, easy to eat straight off the vine, and their sweetness contrasts perfectly with salty meats and rich cheeses. Sliced strawberries, blackberries, apple slices, and dried apricots all work beautifully too. For veggies, mini cucumbers, sliced bell peppers, or cherry tomatoes add a fresh crunch that cuts through the richness. Do not skip this step — the color and freshness these elements bring makes your board look like it belongs in a magazine.
This is where you can really make your board next-level! Small ramekins or bowls filled with honey, strawberry jam, fig preserves, or grainy mustard add a major flavor punch and give the board beautiful visual height. My Easy Slow Cooker Apple Butter makes the most incredible board spread — sweet, warmly spiced, and perfectly thick for scooping with crackers. A generous handful of almonds, walnuts, or candied pecans fills in the gaps and adds satisfying crunch. And a few Castelvetrano olives or briny cornichons add that savory pop that cuts right through the richness of the cheese.
Wondering how much to buy? Here is my general rule of thumb for a board serving 8–10 people as an appetizer: plan on 3–4 oz of meat per person and 1.5–2 oz of cheese per person. That sounds like a lot, but it goes quickly when people are snacking and mingling! For a smaller family board serving 4–6, simply halve those amounts. I always buy just a little extra because an overstuffed board looks far more impressive — and whatever does not get eaten makes for an amazing next-day lunch straight from the fridge.
Let’s Build It!
- Step 1: Set out your board and place small bowls first — these anchor the layout and give you a starting point to build around.
- Step 2: Place your cheeses in different areas of the board, spacing them out so guests can reach each one easily.
- Step 3: Fold or fan your meats in the spaces between the cheese sections.
- Step 4: Tuck crackers in neat rows or fans, filling the gaps around the meats and cheeses.
- Step 5: Add fresh fruits, veggies, and dried fruits in remaining open spaces.
- Step 6: Fill your small bowls with honey, jam, apple butter, or mustard.
- Step 7: Scatter nuts into any remaining gaps.
- Step 8: Finish with a few sprigs of fresh rosemary or thyme for a gorgeous garnish.
- Step 9: Serve right away or cover loosely and refrigerate for up to 2 hours before serving.
Ashley’s Pro-Tips
Use odd numbers when grouping items — three clusters of grapes looks more natural and beautiful than two.
Start with the bowls and work outward — they become anchors that make the rest of the layout flow naturally.
Fold your meats into quarters or roses — standing salami cups up right next to a wedge of brie looks amazing and takes five seconds.
Room temperature cheese tastes better — pull everything from the fridge 30 minutes before guests arrive for the best flavor and texture.
No charcuterie board? Use a large sheet pan lined with parchment paper, a big cutting board, or even a pretty serving tray. You do not need fancy equipment to make this work!
Storage & Pairing
Storing leftovers: Cover the board tightly with plastic wrap or transfer components to an airtight container. Refrigerate for up to 2 days. Pull crackers off the board and store them separately in a zip-lock bag to keep them crispy.
Beverage pairings: Sparkling water with lemon, fresh lemonade, or a crisp white wine all work beautifully. For red wine lovers, a light Pinot Noir pairs perfectly with cured meats and aged cheese.
Kid-friendly board swap: Replace some cured meats with rolled turkey or ham, swap brie for mild cheddar cubes, add apple slices and mini pretzels, and serve with hummus or ranch dip. Kids go absolutely wild for their own little snack board!
A Little Joy on Top
Want to round out your spread into a full appetizer table? Pair this charcuterie board with my Easy Lentil & Veggie Cups — they are protein-packed, totally portable, and even picky eaters gobble them up. Set them right next to the board for a complete party spread that has everyone raving.
Thinking about a dessert board? My Easy Homemade Brownies cut into bite-sized squares are absolutely irresistible — rich, fudgy, and completely impossible to resist alongside strawberries and a drizzle of caramel.
The most important thing? Do not overthink it. Charcuterie boards are meant to be fun, beautiful, and imperfectly perfect — just like everything we make in this kitchen. A gorgeous board and good company is truly all you need to make any occasion feel special.
Want to Save This Recipe?
Enter your email below, and we’ll send the link straight to your inbox.
Easy Charcuterie Board 101 Recipe
Ingredients
Method
- Set out your board and place small bowls first for honey, jam, and olives — these anchor the layout and give you a starting point to build around.
- Place cheeses in different areas of the board, spacing them out so guests can reach each one easily.
- Fold or fan your meats in the spaces between the cheese sections. Fold salami in half twice to create little cups.
- Tuck crackers in neat rows or fans, filling gaps around the meats and cheeses.
- Add grapes, strawberries, and other fruits in remaining open spaces.
- Fill small bowls with honey, jam or preserves, and olives.
- Scatter nuts into any remaining gaps.
- Garnish with fresh rosemary or thyme sprigs if desired.
- Serve immediately or cover loosely and refrigerate for up to 2 hours before serving.
Nutrition
Tried this recipe?
Let us know how it was!
Meet Ashleybakeseasy
Welcome to Ashley Bakes Easy! I’m Ashley, a home cook and mother who believes that delicious food doesn’t have to be complicated. My journey in the kitchen started with a simple goal: create meals that my whole family would love, we could afford on a single income, and create recipes tailored for our special needs son Winston.
LET’S CONNECT!
Hello Form Ashleybakeseasy
Welcome to Ashley Bakes Easy! I’m Ashley, a home cook and mother who believes that delicious food doesn’t have to be complicated. My journey in the kitchen started with a simple goal: create meals that my whole family would love, we could afford on a single income, and create recipes tailored for our special needs son Winston.
Leave a Reply