
Easy Classic Lemon Tart

Comments
This Post May Contain Affiliate Links. Please Read Our Disclosure Policy
Hey friends! Ashley here. Sometimes you want a dessert that feels genuinely special — the kind that makes guests think you’ve been secretly attending pastry school on the weekends. This Easy Classic Lemon Tart is exactly that dessert! With a buttery golden Oreo cookie crust and the most silky, creamy lemon curd filling, this is a stunning showstopper that’s far more approachable than it looks. The crust comes together in just minutes — pulse the Oreos, mix in butter, press, and bake — while the lemon curd is cooked gently over a double boiler, strained until perfectly smooth, and enriched with butter until it gleams. Pour it into the cooled crust and let it chill into pure, tangy perfection. Make-ahead friendly, absolutely stunning, and worth every single step. Ready to impress, y’all?
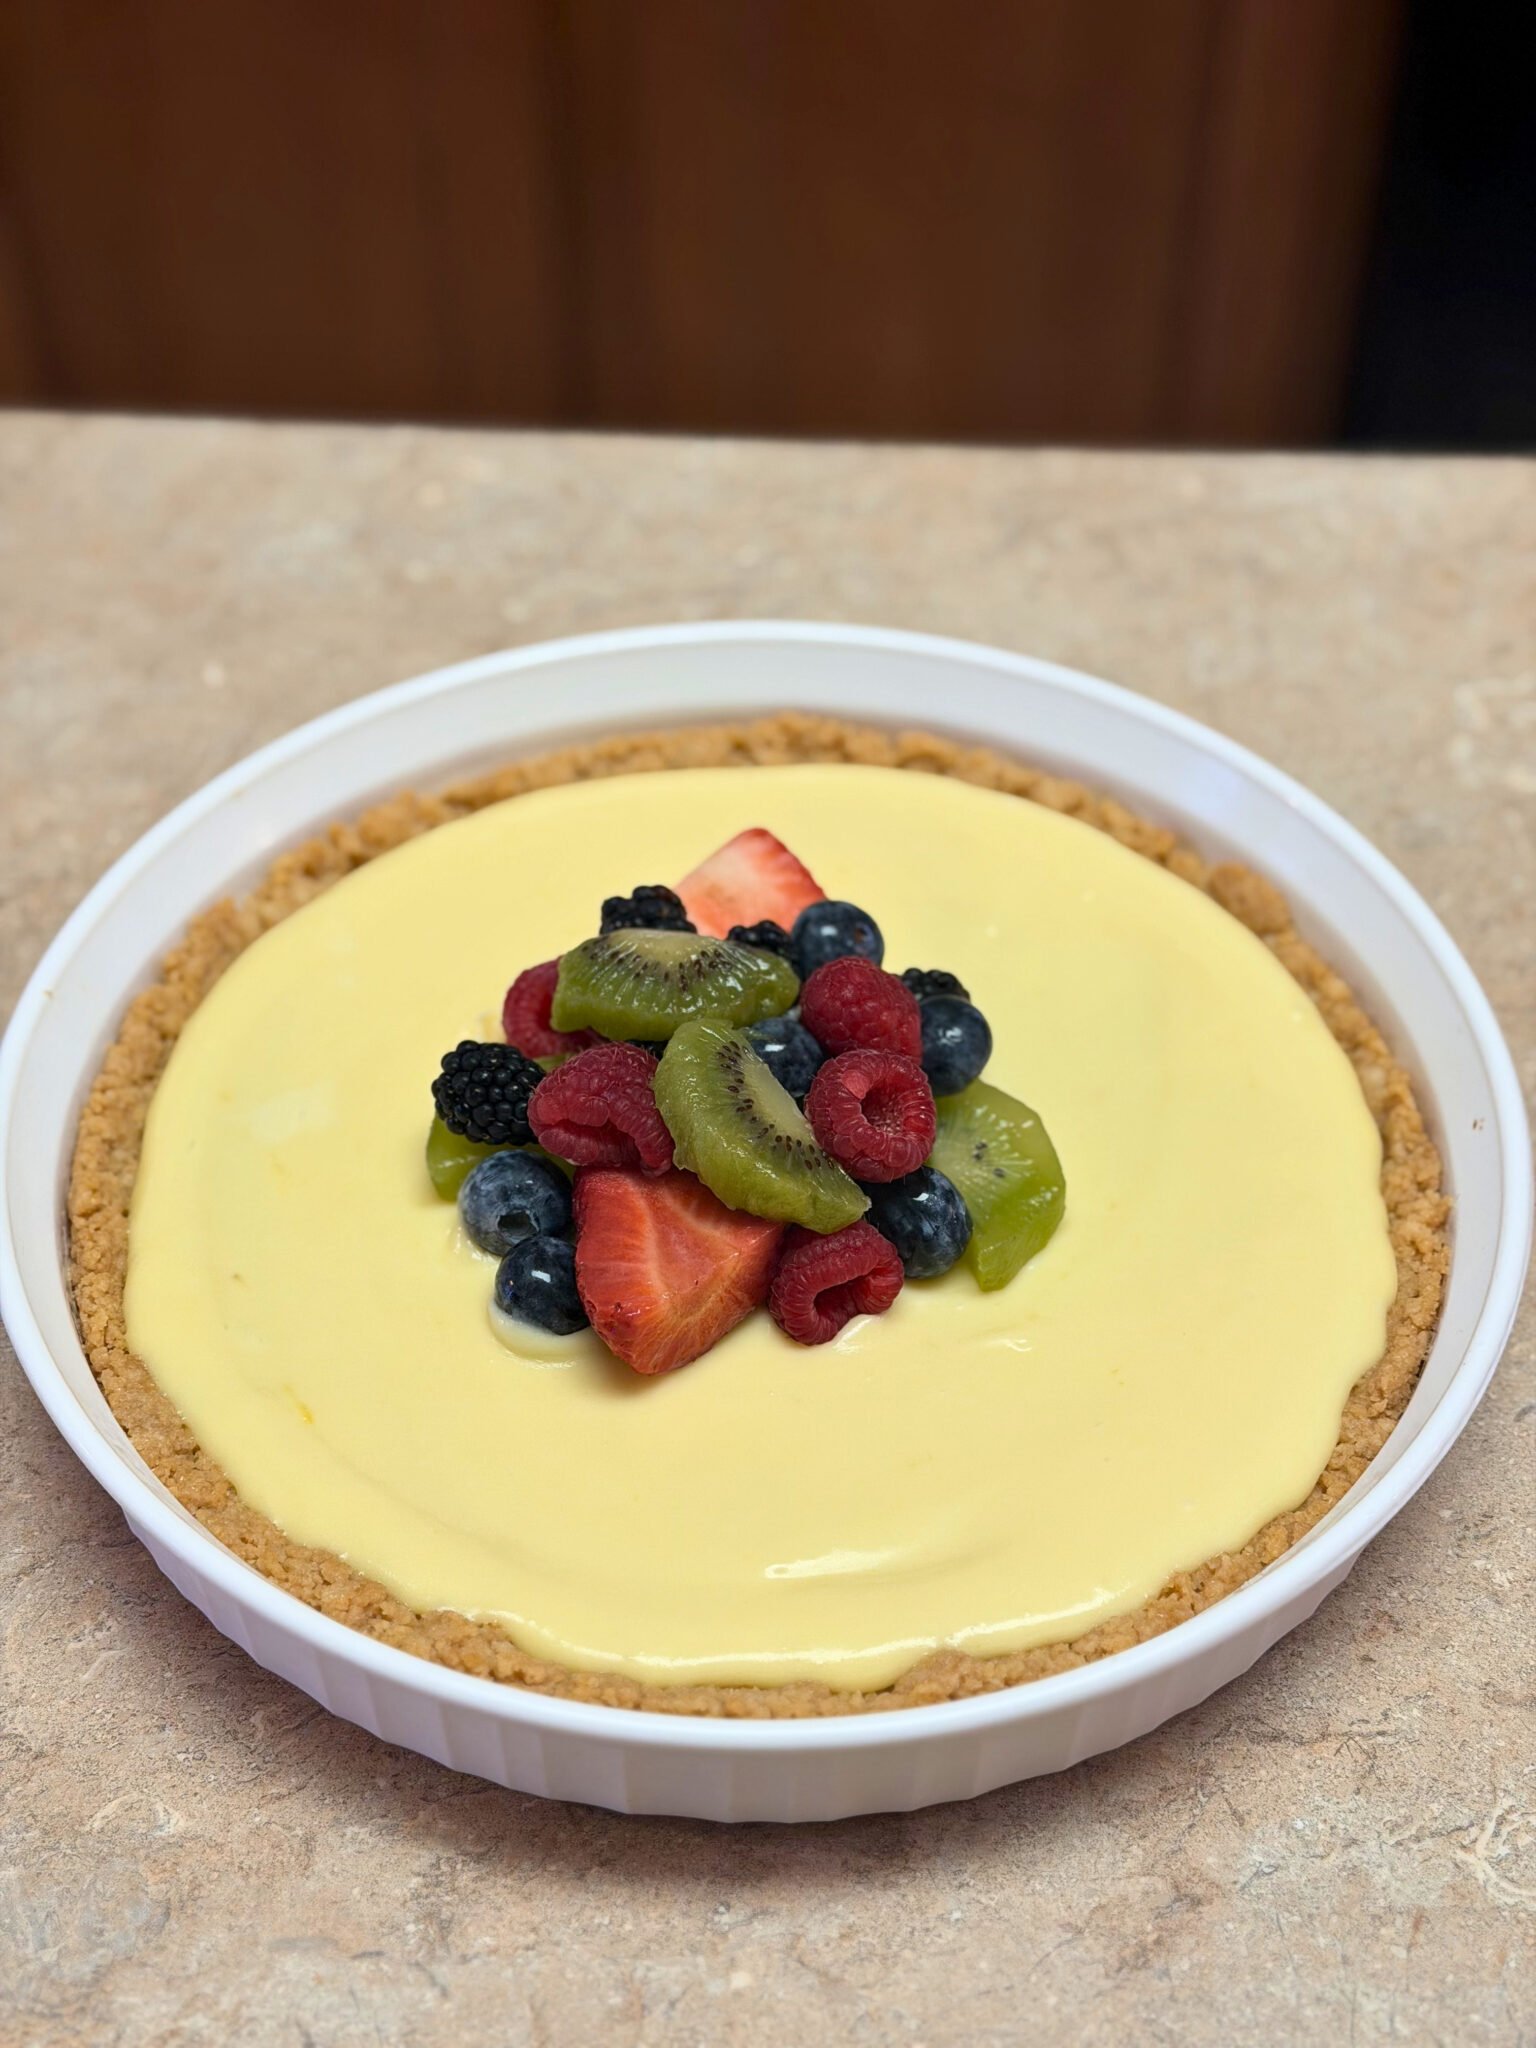
Why You’ll Love This Easy Classic Lemon Tart
- Tip: Perfect Make-Ahead Dessert: The lemon curd can be made up to a week ahead, and the assembled tart chills for at least 4 hours — meaning this is actually ideal for entertaining. Make it the night before and relax while your guests arrive!
- Tip: Silky, Showstopping Filling: The double-boiler method and careful straining create a lemon curd so smooth and creamy it practically melts on your tongue. The optional heavy cream makes it extra luxurious — I always include it!
- Tip: Bright, Perfectly Balanced Flavor: Fresh lemon zest AND fresh lemon juice give this tart a vibrant brightness that’s tart enough to wake up your taste buds, beautifully balanced with just enough butter and sugar to make it completely craveable.
- Tip: Impressive Yet Completely Achievable: This tart looks like it came straight from a French patisserie, but the steps are entirely manageable for any home baker willing to take their time. It’s the definition of impressive-yet-approachable baking.
- Tip: Versatile and Stunning to Serve: Serve simply with powdered sugar, dressed up with fresh berries and whipped cream, or pure and unadorned to let the golden filling shine. This tart suits every occasion from a casual family dinner to a beautiful celebration.
This is a recipe for those moments when ordinary just won’t do — when you want something that makes people stop mid-bite, close their eyes, and say “this is incredible.” That reaction is absolutely worth every single minute spent at the stove.
Ingredient Spotlight: The Golden Oreo Crust & Lemon Curd
The crust for this tart is a genius two-ingredient wonder — 26 golden Oreos and 5 tablespoons of melted butter. That’s it! Pulse the Oreos in a food processor until you have fine, even crumbs, stir in the melted butter, then press the mixture into a 9-inch tart dish, pushing it slightly up the sides. Bake at 325°F for 10–12 minutes until just barely golden. The golden Oreo crust adds a subtle vanilla-cookie sweetness that pairs beautifully with the bright, tangy lemon curd — honestly a match made in dessert heaven!
The heart of this tart is undeniably the lemon curd. You’ll need 2 large eggs plus 2 egg yolks (or 3 whole eggs — both work, but the extra yolks create a richer, more custardy curd), ¾ cup granulated sugar, 1 tablespoon of fresh lemon zest (please, please use fresh — bottled lemon juice won’t give you the same vibrant, aromatic flavor the zest provides), ½ cup freshly squeezed lemon juice from about 2–3 lemons, and ½ cup of cold unsalted butter cut into small cubes. The 2 tablespoons of optional heavy cream add an extra layer of richness that makes the curd noticeably more luxurious — I always include it and highly recommend you do too!
Quality of ingredients matters enormously here. Fresh lemons give a cleaner, brighter, more floral flavor that makes all the difference. Look for firm, heavy lemons with fragrant, unblemished skin. Roll them firmly on the counter before juicing to maximize the yield. For the butter, unsalted is essential — you want to control the salt level yourself. Have it cut into small cubes and ready to go before you begin cooking the curd, because timing matters once the curd is hot.
The cooking method is a classic bain-marie — a heatproof bowl set over a saucepan of gently simmering water that never directly touches the water. This gentle, indirect heat is what prevents the eggs from scrambling and gives the curd its impossibly smooth, creamy texture. The curd is done when it registers 170°F on an instant-read thermometer, or when it coats the back of a wooden spoon and a finger drawn through it leaves a clear, clean line. Patience is truly the secret ingredient here!
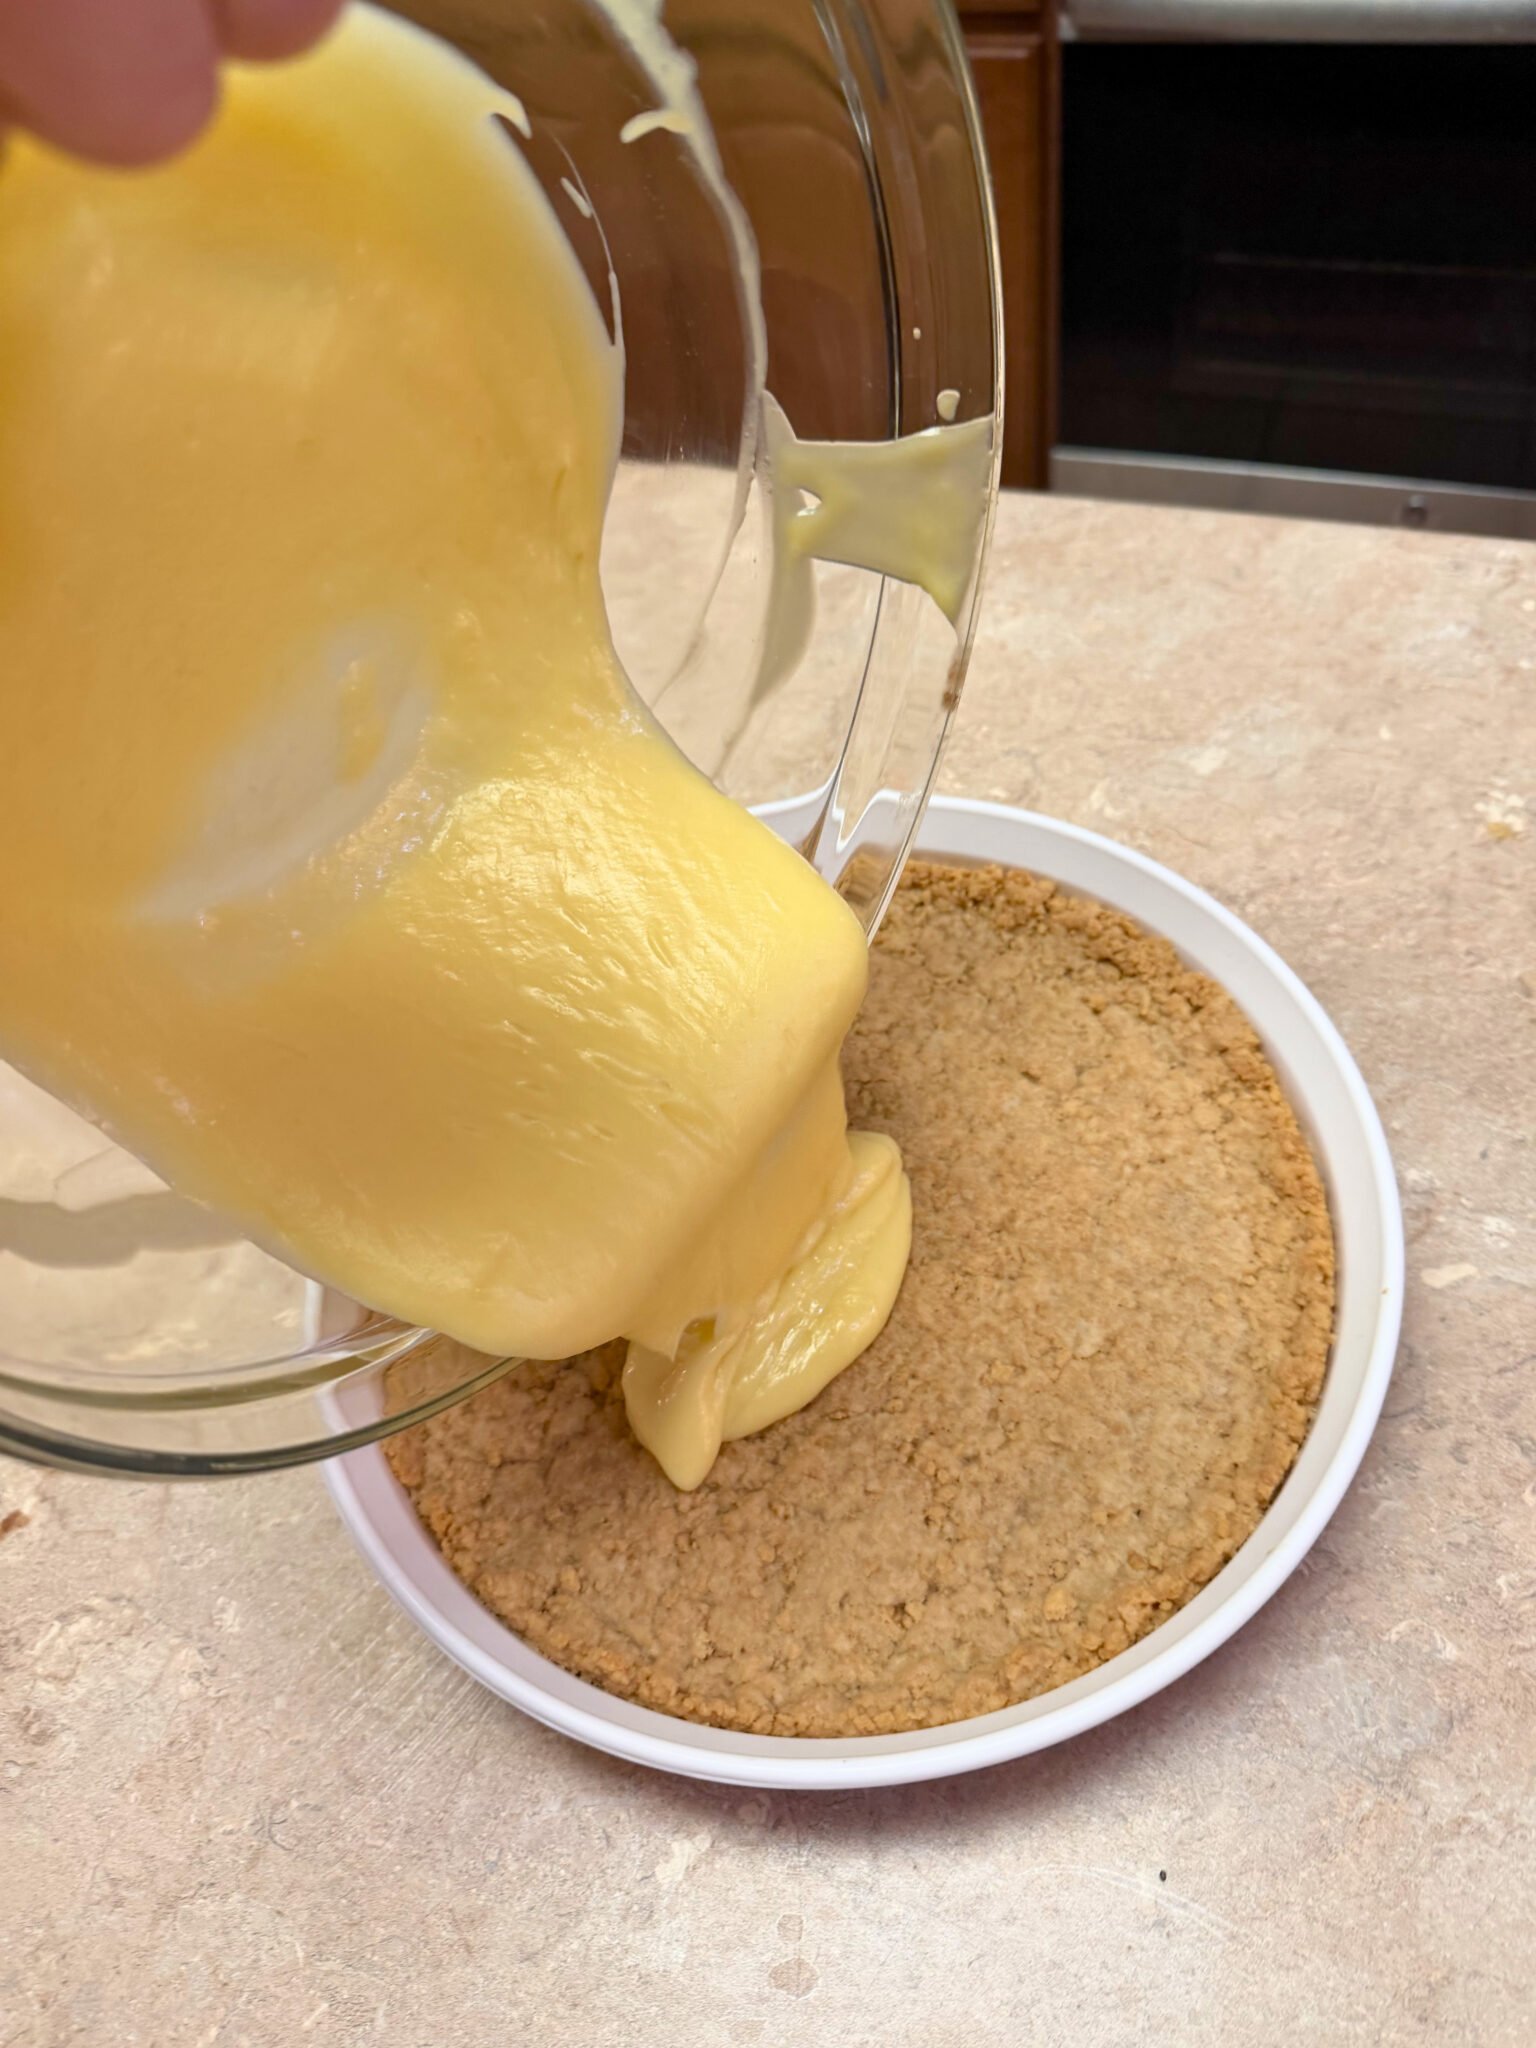
Let’s Bake! Classic Lemon Tart Step-by-Step
- Pulse the Oreos:: Add 26 golden Oreos to a food processor and pulse until you have fine, even crumbs.
- Mix the crust:: Transfer crumbs to a bowl, add the 5 tablespoons of melted butter, and stir until all crumbs are evenly coated.
- Press and bake the crust:: Press the mixture evenly into a 9-inch tart dish, pushing it slightly up the sides. Bake at 325°F for 10–12 minutes until slightly golden. Let cool completely before filling.
- Combine curd ingredients:: In a medium heatproof bowl, whisk together the eggs and yolks, sugar, lemon zest, lemon juice, and heavy cream (if using) until smooth and well combined.
- Cook over bain-marie:: Set the bowl over a saucepan of gently simmering water, ensuring the bottom of the bowl doesn’t touch the water. Cook over moderate heat, whisking constantly, for 10–20 minutes until the curd thickens and reaches 170°F.
- Strain immediately:: Remove from heat and immediately strain through a fine mesh sieve into a clean bowl — this removes any cooked egg bits and zest for the smoothest possible texture.
- Whisk in butter:: Add the cold butter cubes a few pieces at a time, whisking after each addition until completely melted and incorporated before adding more. Take your time — this creates the beautiful silky, glossy texture.
- Cool to room temperature:: Allow the curd to cool at room temperature, whisking occasionally. It will continue thickening as it cools.
- Fill and chill:: Pour the cooled curd into the completely cooled Oreo crust and spread evenly. Refrigerate for at least 4 hours, or overnight, until completely set.
- Serve:: Slice with a sharp, warm knife. Top with fresh berries, whipped cream, and a dusting of powdered sugar if desired.
Ashley’s Pro-Tips for Lemon Tart Success
Don’t skip the bake on your Oreo crust! That 10–12 minutes in the oven is what firms up the butter and sets the crumbs so everything holds together beautifully when you slice. Let it cool completely before adding the lemon curd — pouring warm curd onto a warm crust can cause the filling to set unevenly.
Never rush the heat! Medium heat and constant whisking are the keys to perfect lemon curd. Too high and you’ll scramble the eggs; too low and it takes forever and loses its bright flavor. Steady, patient cooking over a bain-marie is everything — and it’s genuinely meditative once you get into the rhythm of it.
The curd thickens more as it cools, so don’t overcook it trying to get it super thick on the stove. When it coats the back of a spoon and leaves a clear finger trail — that’s your signal. Remove it from heat immediately and strain it right away before it continues cooking from residual heat.
Strain every single time, even if the curd looks perfectly smooth. A fine mesh sieve removes any tiny cooked egg bits that can create an unpleasant texture in the finished tart. Ten extra seconds of straining makes an enormous difference in the final result — this step is non-negotiable!
Use a tart pan with a removable bottom — this makes unmolding infinitely easier and gives you those gorgeous, sharp, clean edges that make the tart look like it belongs in a professional bakery window. Run a warm, dry knife under hot water before slicing for perfect, clean cuts.
Storage & Make-Ahead Tips
The assembled lemon tart keeps beautifully in the refrigerator, covered loosely with plastic wrap, for up to 3 days. The flavor actually improves overnight as the curd and crust meld together — the day-after slice is absolutely divine. Keep it refrigerated right up until just before serving.
The lemon curd alone (without the tart shell) can be stored in an airtight container in the refrigerator for up to 1 week, or frozen for up to 2 months. Thaw overnight in the fridge and whisk to re-smooth before using. This makes the tart very easy to prep in stages for stress-free entertaining!
I don’t recommend freezing the fully assembled tart — the Oreo crust can absorb moisture from the curd and become soggy when thawed. The better approach is to make the curd in advance (fridge or freezer), make the Oreo crust fresh, and assemble 1–2 days before your event for the absolute best result.
A Little Joy on Top
Few things bring me more pure joy than setting this tart on a table and watching people’s faces when they take the first bite. That initial brightness of lemon giving way to buttery richness and that perfect, creamy texture — it’s genuinely one of those imperfectly perfect desserts that feels like pure sunshine on a plate. Spring or summer, this tart is always the right choice.
This tart is stunning alongside fresh raspberries or strawberries — the berry-lemon combination is classic for good reason! A cloud of lightly sweetened whipped cream on the side turns it into an absolute showstopper for any dinner party, bridal shower, Easter table, or spring celebration.
If you love bright, citrusy desserts, you’ll also want to try my Easy ABC Toddler Cookies for a wholesome, fruit-forward treat the little ones will adore. And for a rich, indulgent twist on the tart theme, check out my Easy Chocolate Raspberry Tart!
I hope this Easy Classic Lemon Tart brings as much joy to your table as it does to ours! If you make it, I’d love to see your beautiful creation — tag me on social and show me that gorgeous golden filling. Happy baking, y’all!
Want to Save This Recipe?
Enter your email below, and we’ll send the link straight to your inbox.
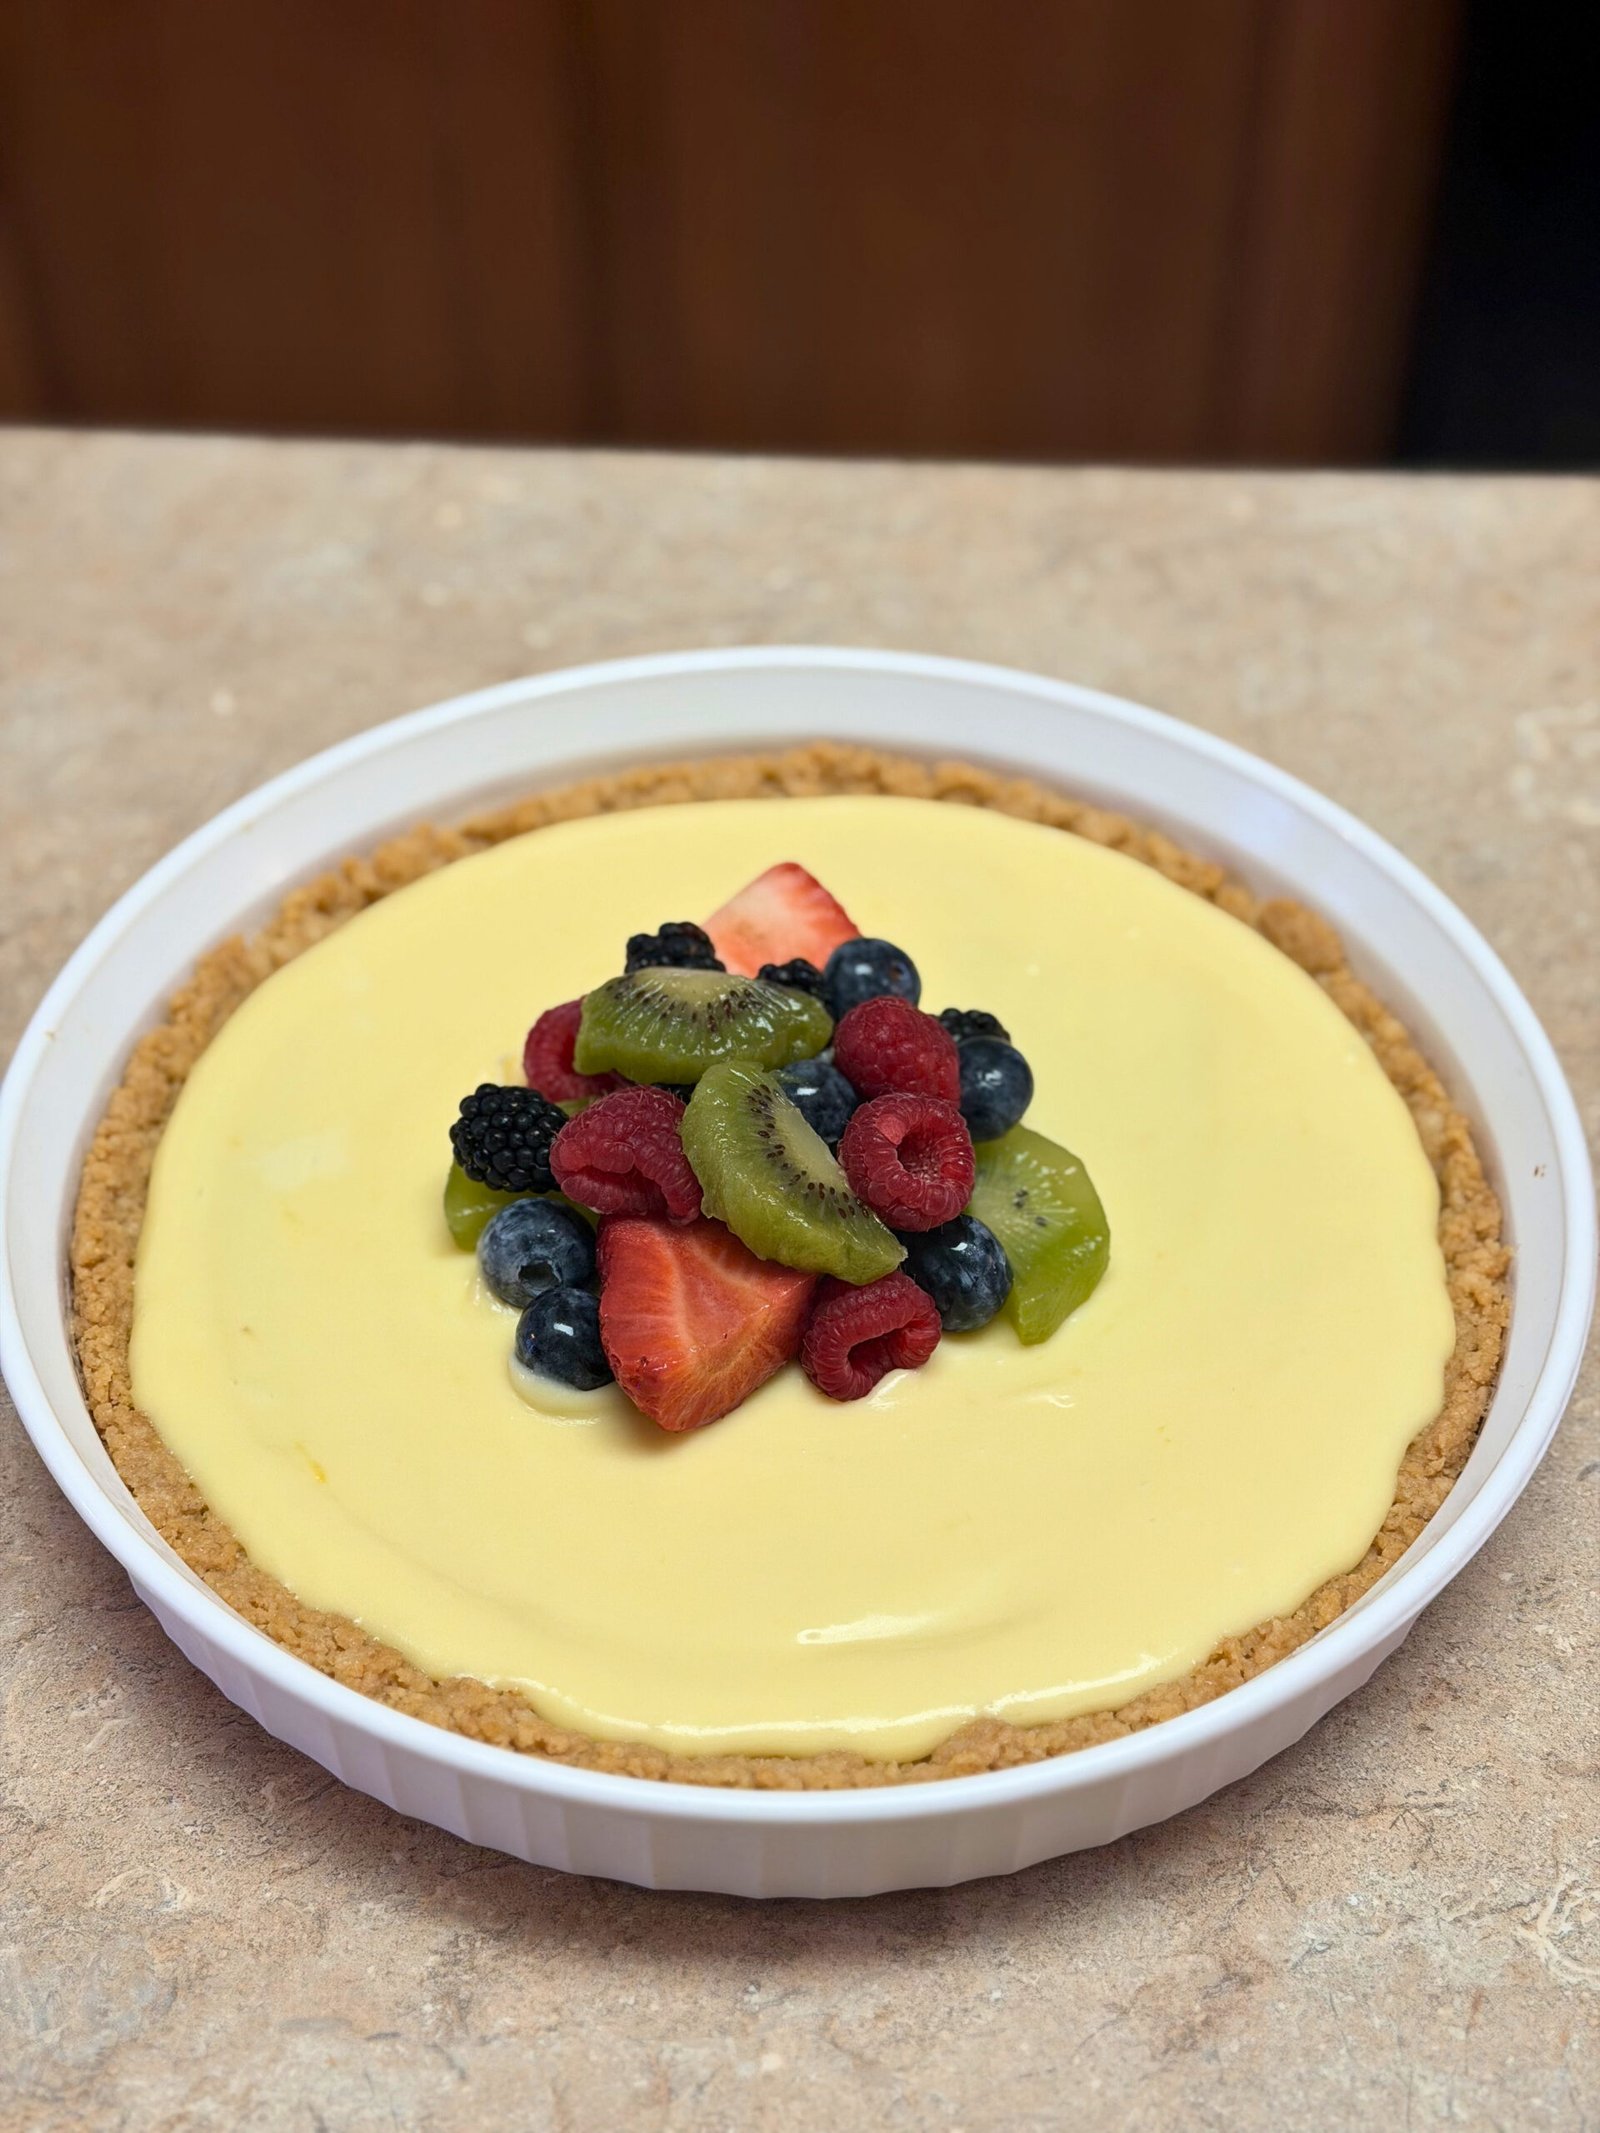
Easy Classic Lemon Tart Recipe
Ingredients
Method
- Add 26 golden Oreos to a food processor and pulse until you have fine, even crumbs.
- Transfer crumbs to a bowl, add the melted butter, and stir until all crumbs are evenly coated.
- Press the mixture evenly into a 9-inch tart dish, pushing it slightly up the sides. Bake at 325°F for 10–12 minutes until slightly golden. Let cool completely before filling.
- In a medium heatproof bowl, whisk together the eggs, egg yolks, sugar, lemon zest, lemon juice, and heavy cream until smooth and combined.
- Set the bowl over a saucepan of gently simmering water (bain-marie), ensuring the bowl bottom does not touch the water. Cook over moderate heat, whisking constantly, for 10–20 minutes until the curd thickens and reaches 170°F, or coats the back of a spoon with a clear finger trail.
- Remove from heat immediately and strain through a fine mesh sieve into a clean bowl.
- Add the cold butter cubes a few pieces at a time, whisking until each addition is completely melted and incorporated before adding more. The curd will become beautifully silky and glossy.
- Allow the curd to cool to room temperature, whisking occasionally. It will continue to thicken as it cools.
- Pour the cooled curd into the completely cooled Oreo crust. Spread evenly. Refrigerate for at least 4 hours, or overnight, until completely set.
- Slice with a sharp, warm knife. Serve with fresh berries, whipped cream, and a dusting of powdered sugar if desired.
Nutrition
Tried this recipe?
Let us know how it was!
Meet Ashleybakeseasy
Welcome to Ashley Bakes Easy! I’m Ashley, a home cook and mother who believes that delicious food doesn’t have to be complicated. My journey in the kitchen started with a simple goal: create meals that my whole family would love, we could afford on a single income, and create recipes tailored for our special needs son Winston.
LET’S CONNECT!

Hello Form Ashleybakeseasy
Welcome to Ashley Bakes Easy! I’m Ashley, a home cook and mother who believes that delicious food doesn’t have to be complicated. My journey in the kitchen started with a simple goal: create meals that my whole family would love, we could afford on a single income, and create recipes tailored for our special needs son Winston.

Leave a Reply