
Easy Herb Roasted Cast Iron Veggies

Comments
This Post May Contain Affiliate Links. Please Read Our Disclosure Policy
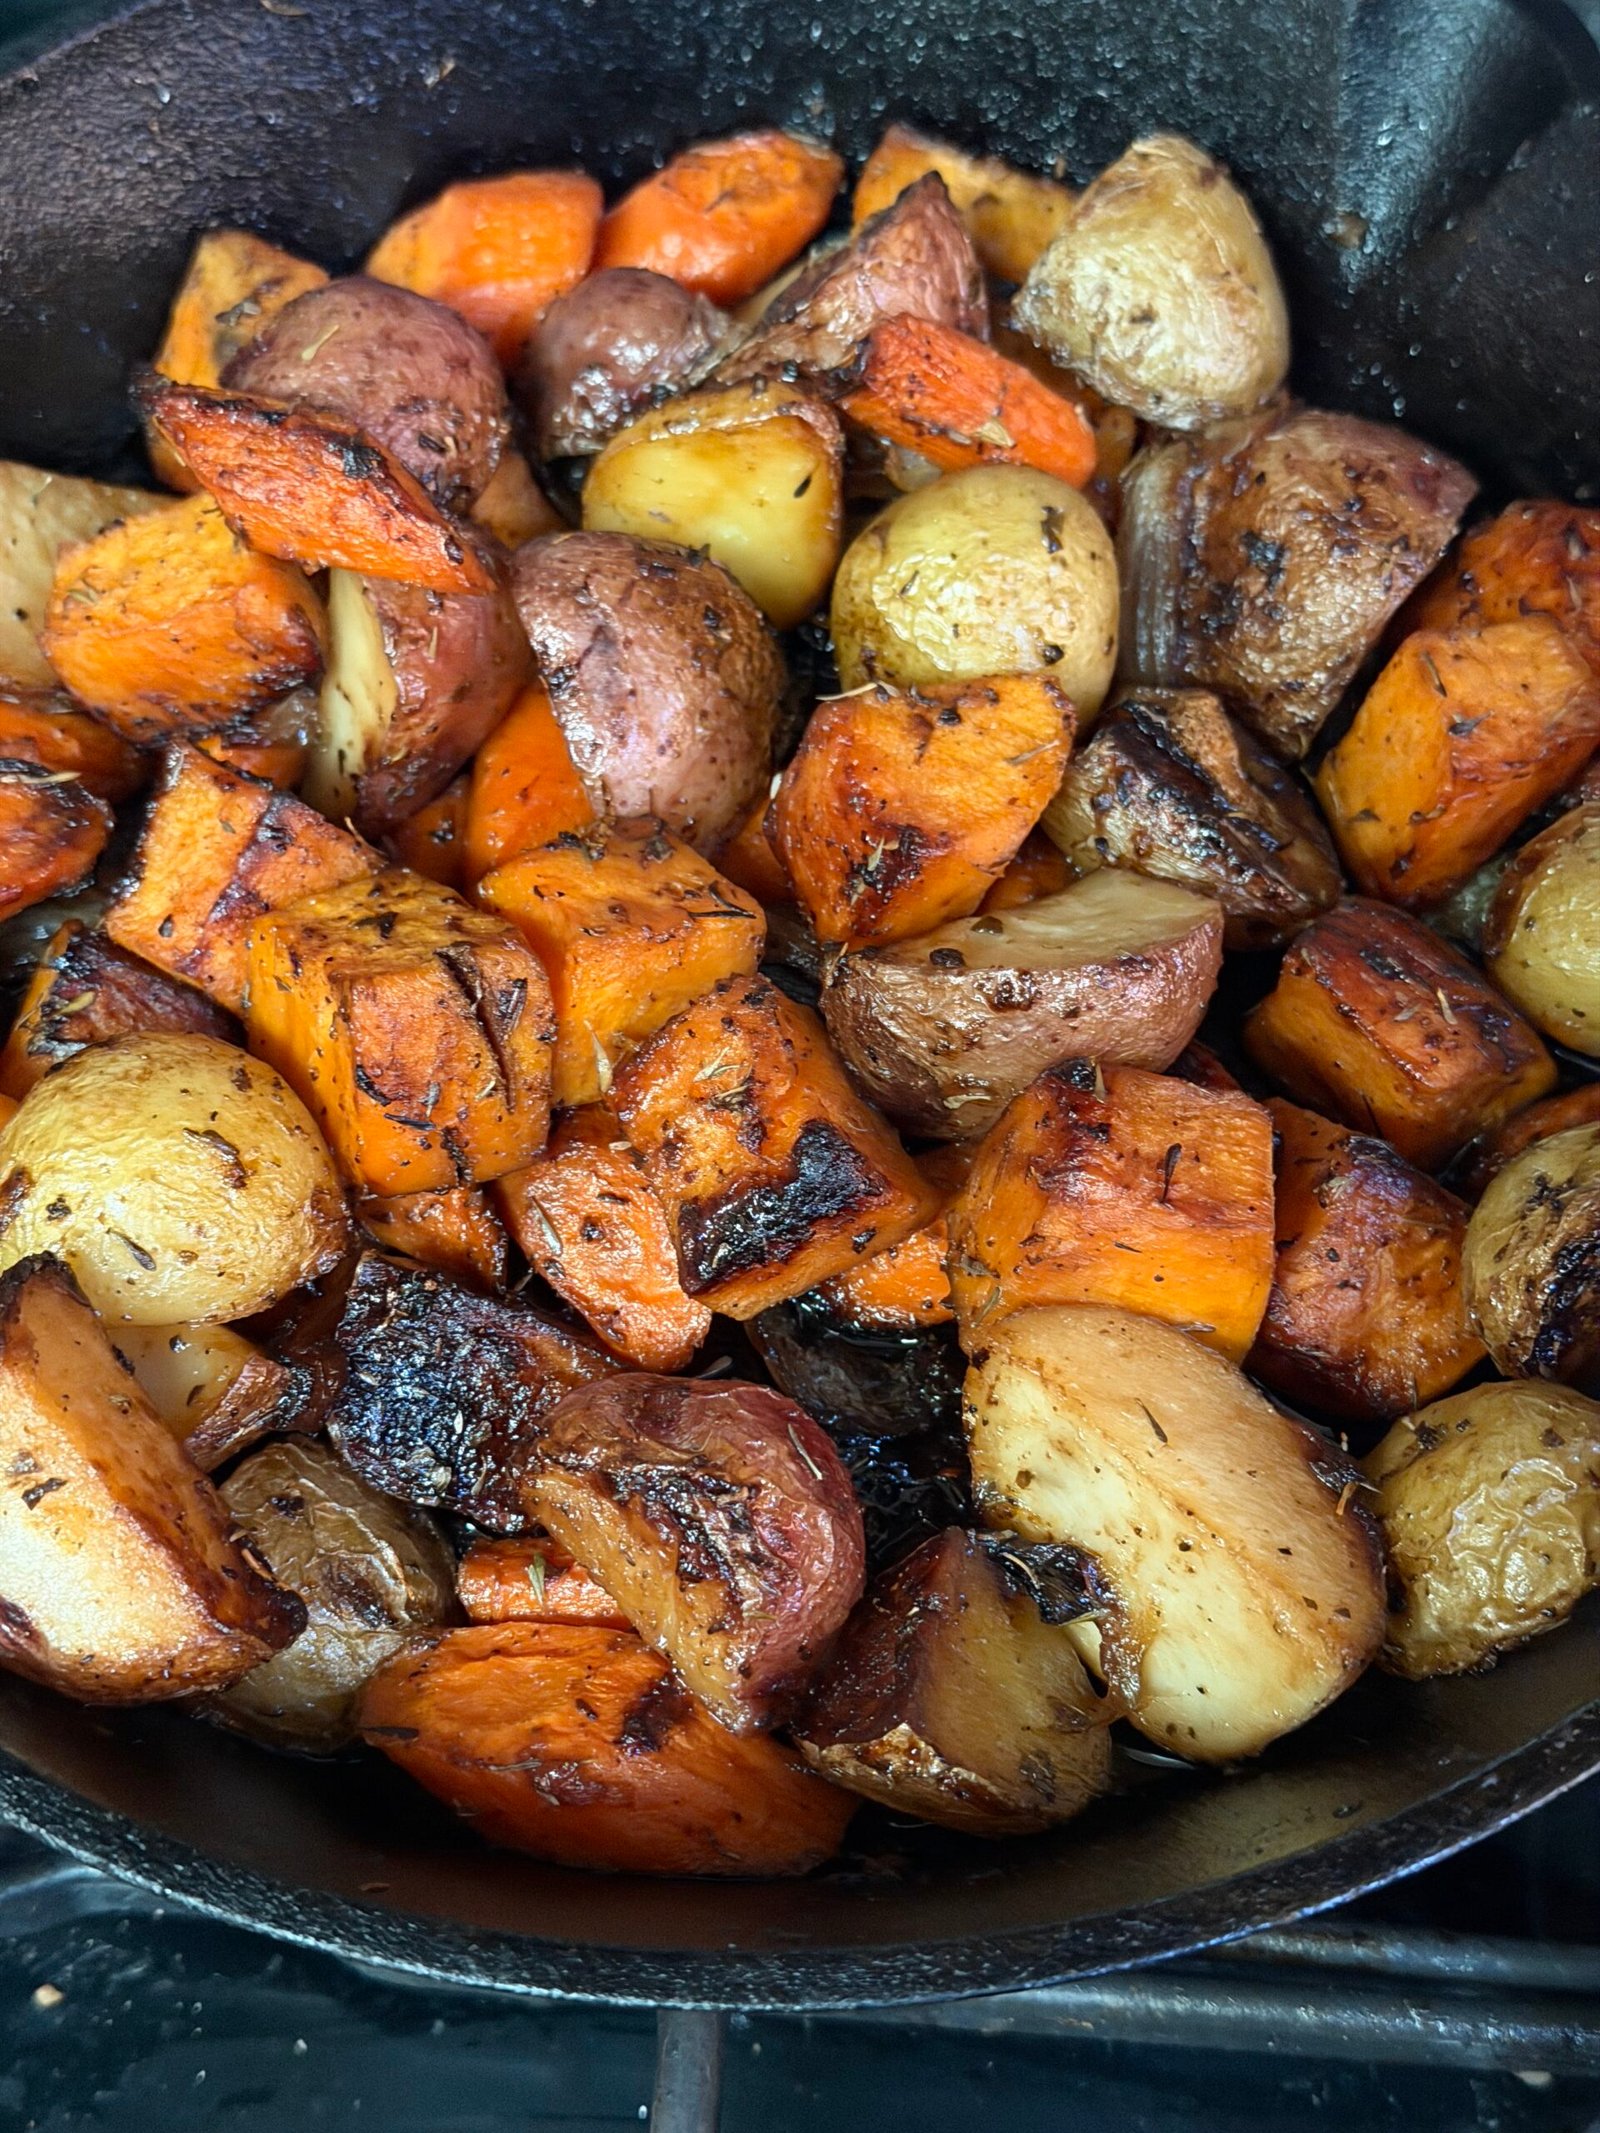
Hey friends! Ashley here. Can we talk about the magic of a cast iron skillet? These cast iron roasted veggies have been on repeat in our house ever since I discovered the stovetop-to-oven method one chaotic Tuesday when I desperately needed a side dish that would actually get eaten. Sweet potatoes, yellow potatoes, carrots, and onion all tossed in honey and earthy herbs, seared on the stovetop to build that golden crust, then finished in a screaming-hot oven until perfectly caramelized. My kids actually ask for more veggies when these are on the menu — and y’all, that is how you know it’s a winner. Ready? Let’s go!
Why You’ll Love This Herb Roasted Cast Iron Veggies
These cast iron roasted veggies are the side dish you’ll want to serve alongside absolutely everything — and here’s exactly why.
- One Pan, No Fuss: The cast iron skillet goes from stovetop straight to oven without missing a beat — less cleanup, fewer dishes, more time with your people. It’s the kind of imperfectly perfect cooking that fits real life. Future-you will absolutely thank you.
- Caramelized, Crispy Edges: Starting the veggies on high heat in that cast iron builds a beautiful golden sear before the oven finishes the job. The honey glaze turns into sticky, deeply caramelized perfection at the edges. This is the texture that makes vegetables completely impossible to resist.
- Loaded with Colorful Veggies: Sweet potatoes, yellow potatoes, carrots, and onion mean every bite has something a little different going on. You’re getting natural sweetness, earthiness, and a gorgeous pop of color all in one pan. It’s as beautiful as it is delicious.
- Quick 10-Minute Prep: All you’re doing is dicing, tossing, and seasoning — seriously, that’s it. No complicated techniques, no specialty equipment beyond your trusty cast iron. Anyone can pull this off on a weeknight, even when you’re totally running on empty.
- Kid-Approved Every Single Time: The honey glaze adds just enough sweetness to make even the pickiest eaters interested. My kids call these ‘the sweet veggies’ and actually ask for them by name. When you can get little ones excited about carrots and potatoes — y’all, you’ve done something very right.
These are the imperfectly perfect veggies that belong on every dinner table, every single week.
Ingredient Spotlight: Sweet Potatoes & the Honey Herb Glaze
Sweet potatoes are the star of this dish. Unlike regular russet potatoes, sweet potatoes bring a natural, gentle sweetness and a creamy interior that holds up beautifully under blazing high heat. Look for firm ones without soft spots — medium-sized work best for even cooking. If you’re out of sweet potatoes, butternut squash or parsnips are wonderful swaps that roast just as beautifully in the cast iron.
Yellow potatoes — think Yukon Golds — are the perfect partner in this recipe because of their naturally buttery, creamy flavor and waxy texture. They hold their shape at 450°F while still getting those gorgeous crispy edges you’re after. Red potatoes work just as well if that’s what you’ve got sitting in the pantry.
The honey and oil combo is where the real magic happens. The honey caramelizes in the blazing-hot cast iron, creating those sticky, golden, almost candy-like edges that make these veggies completely addictive. Use a neutral oil with a high smoke point — avocado oil or vegetable oil is ideal. Olive oil works too but can smoke slightly at 450°F, which is totally fine — just be ready for it.
The herb trio of dried parsley, thyme, and rosemary is classic for good reason — earthy, fragrant, and completely complementary to the sweetness of that honey glaze. Dried herbs are actually the better choice here since fresh herbs would burn in the high heat. Want to customize? A pinch of garlic powder or smoked paprika takes these over the top. And always, always be generous with salt and pepper — it’s what ties every single layer of flavor together.
Let’s Make Herb Roasted Cast Iron Veggies Step-by-Step
- Preheat Your Oven: Crank the oven to 450°F. A blazing-hot oven is exactly what gives these veggies their caramelized crust — don’t skip the full preheat!
- Prep the Veggies: Dice the sweet potatoes and yellow potatoes into roughly 1-inch cubes for even cooking. Slice the carrots and onion into similar-sized pieces. Try to keep everything uniform so it all finishes cooking at the same time.
- Toss in the Honey Herb Glaze: Add all the veggies to a large bowl. Pour in the honey and oil and toss until everything is well coated. Add the dried parsley, thyme, rosemary, salt, and pepper, then toss again until every piece is evenly seasoned and glistening.
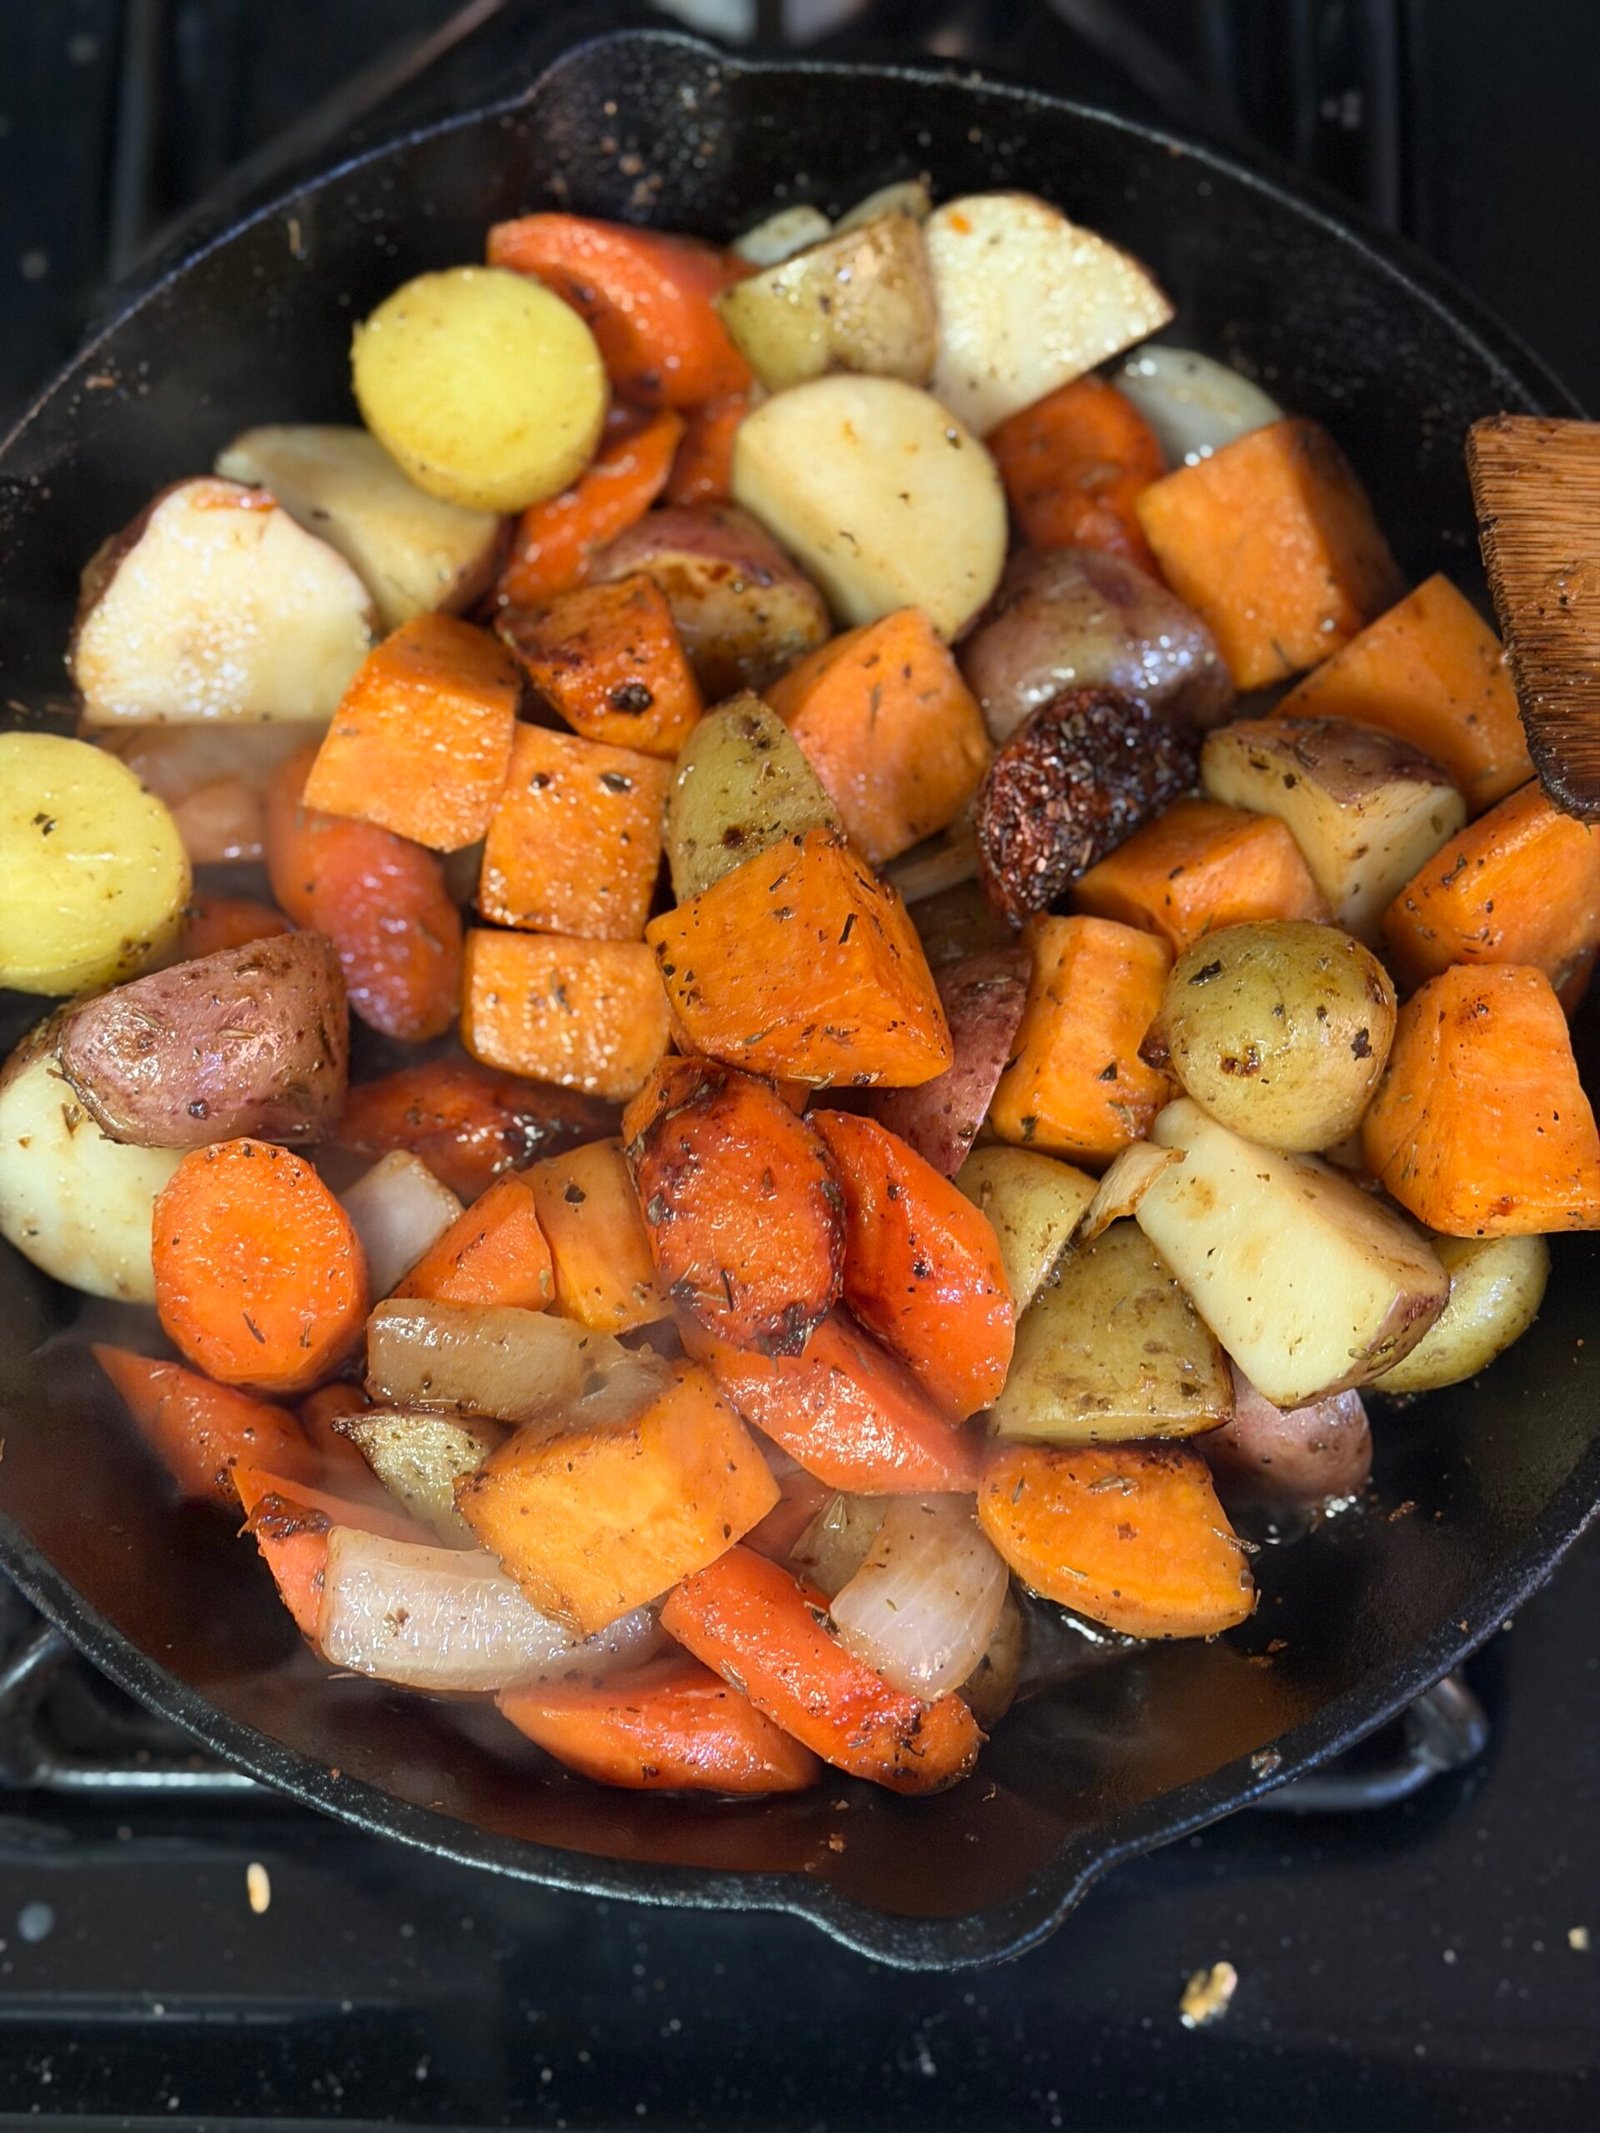
- Sear on the Stovetop: Drizzle a little extra oil into your cast iron skillet and heat it over medium-high. Once hot, add the seasoned veggies in an even layer. Cook for 12–15 minutes, stirring occasionally, to build that golden caramelized color — this stovetop step is non-negotiable!
- Finish in the Oven: Carefully transfer the cast iron skillet straight into the preheated 450°F oven. Roast for an additional 15–20 minutes, or until the veggies are fork-tender and the edges are deeply caramelized. Remove from the oven, let cool for 2 minutes, and serve hot!
Ashley’s Pro-Tips for the Best Cast Iron Veggies
Cut everything the same size. I know it’s tempting to rush through chopping, but uniform pieces really do matter here. If your sweet potato cubes are twice the size of your carrot slices, you’ll end up with undercooked sweet potatoes and mushy carrots. Aim for 1-inch pieces across the board and you’re golden.
Don’t crowd the pan. If your cast iron is packed too tight, the veggies will steam instead of sear — and we are absolutely here for that golden crust. You want hot surface making direct contact with each piece. If your skillet is on the smaller side, do the stovetop sear in two batches, then combine everything for the oven portion.
Let the stovetop do its job. That 12–15 minute stovetop cook might feel long, but resist the urge to constantly stir. Give the veggies a minute or two of uninterrupted contact with the hot cast iron before moving them around — that’s how you build real depth of flavor and those gorgeous caramelized bits on the bottom.
Use the right oil for high heat. At 450°F, you want an oil with a high smoke point. Avocado oil is my top pick because it’s neutral and handles intense heat beautifully. Vegetable or canola oil works just as well. Save the butter for a finishing drizzle right before serving if you want that extra richness — it won’t burn if you add it at the end.
Taste and season at the very end. Veggies need more seasoning than you think, especially at high heat. Don’t be shy during the toss phase. Then, right before serving, give them a quick taste — a pinch of flaky sea salt or a tiny squeeze of fresh lemon can completely transform the dish, and this final seasoning check is non-negotiable!
Storage & Make-Ahead Tips
Fridge Storage: Let the veggies cool completely before transferring them to an airtight container. They’ll keep in the refrigerator for up to 4 days. To reheat, spread in a single layer on a baking sheet and warm in a 400°F oven for 8–10 minutes to bring back that crispy texture. The microwave works in a pinch but tends to make them soft, so the oven is always my first choice.
Freezer Storage: These roasted veggies freeze surprisingly well! Let them cool fully, then spread in a single layer on a baking sheet and freeze for 1–2 hours until solid. Transfer to a freezer-safe zip-top bag and store for up to 2 months. Reheat directly from frozen in a 425°F oven for 15–18 minutes — they won’t be quite as crispy but still taste absolutely amazing.
Make-Ahead Strategy: Want to get a head start on a busy week? Dice and season all the veggies the night before and store them in a covered bowl in the fridge. When you’re ready to cook, just heat the cast iron and go — dinner comes together in no time. You can also fully cook the veggies ahead and reheat in the oven just before serving, making these perfect for weekly meal prep.
A Little Joy on Top
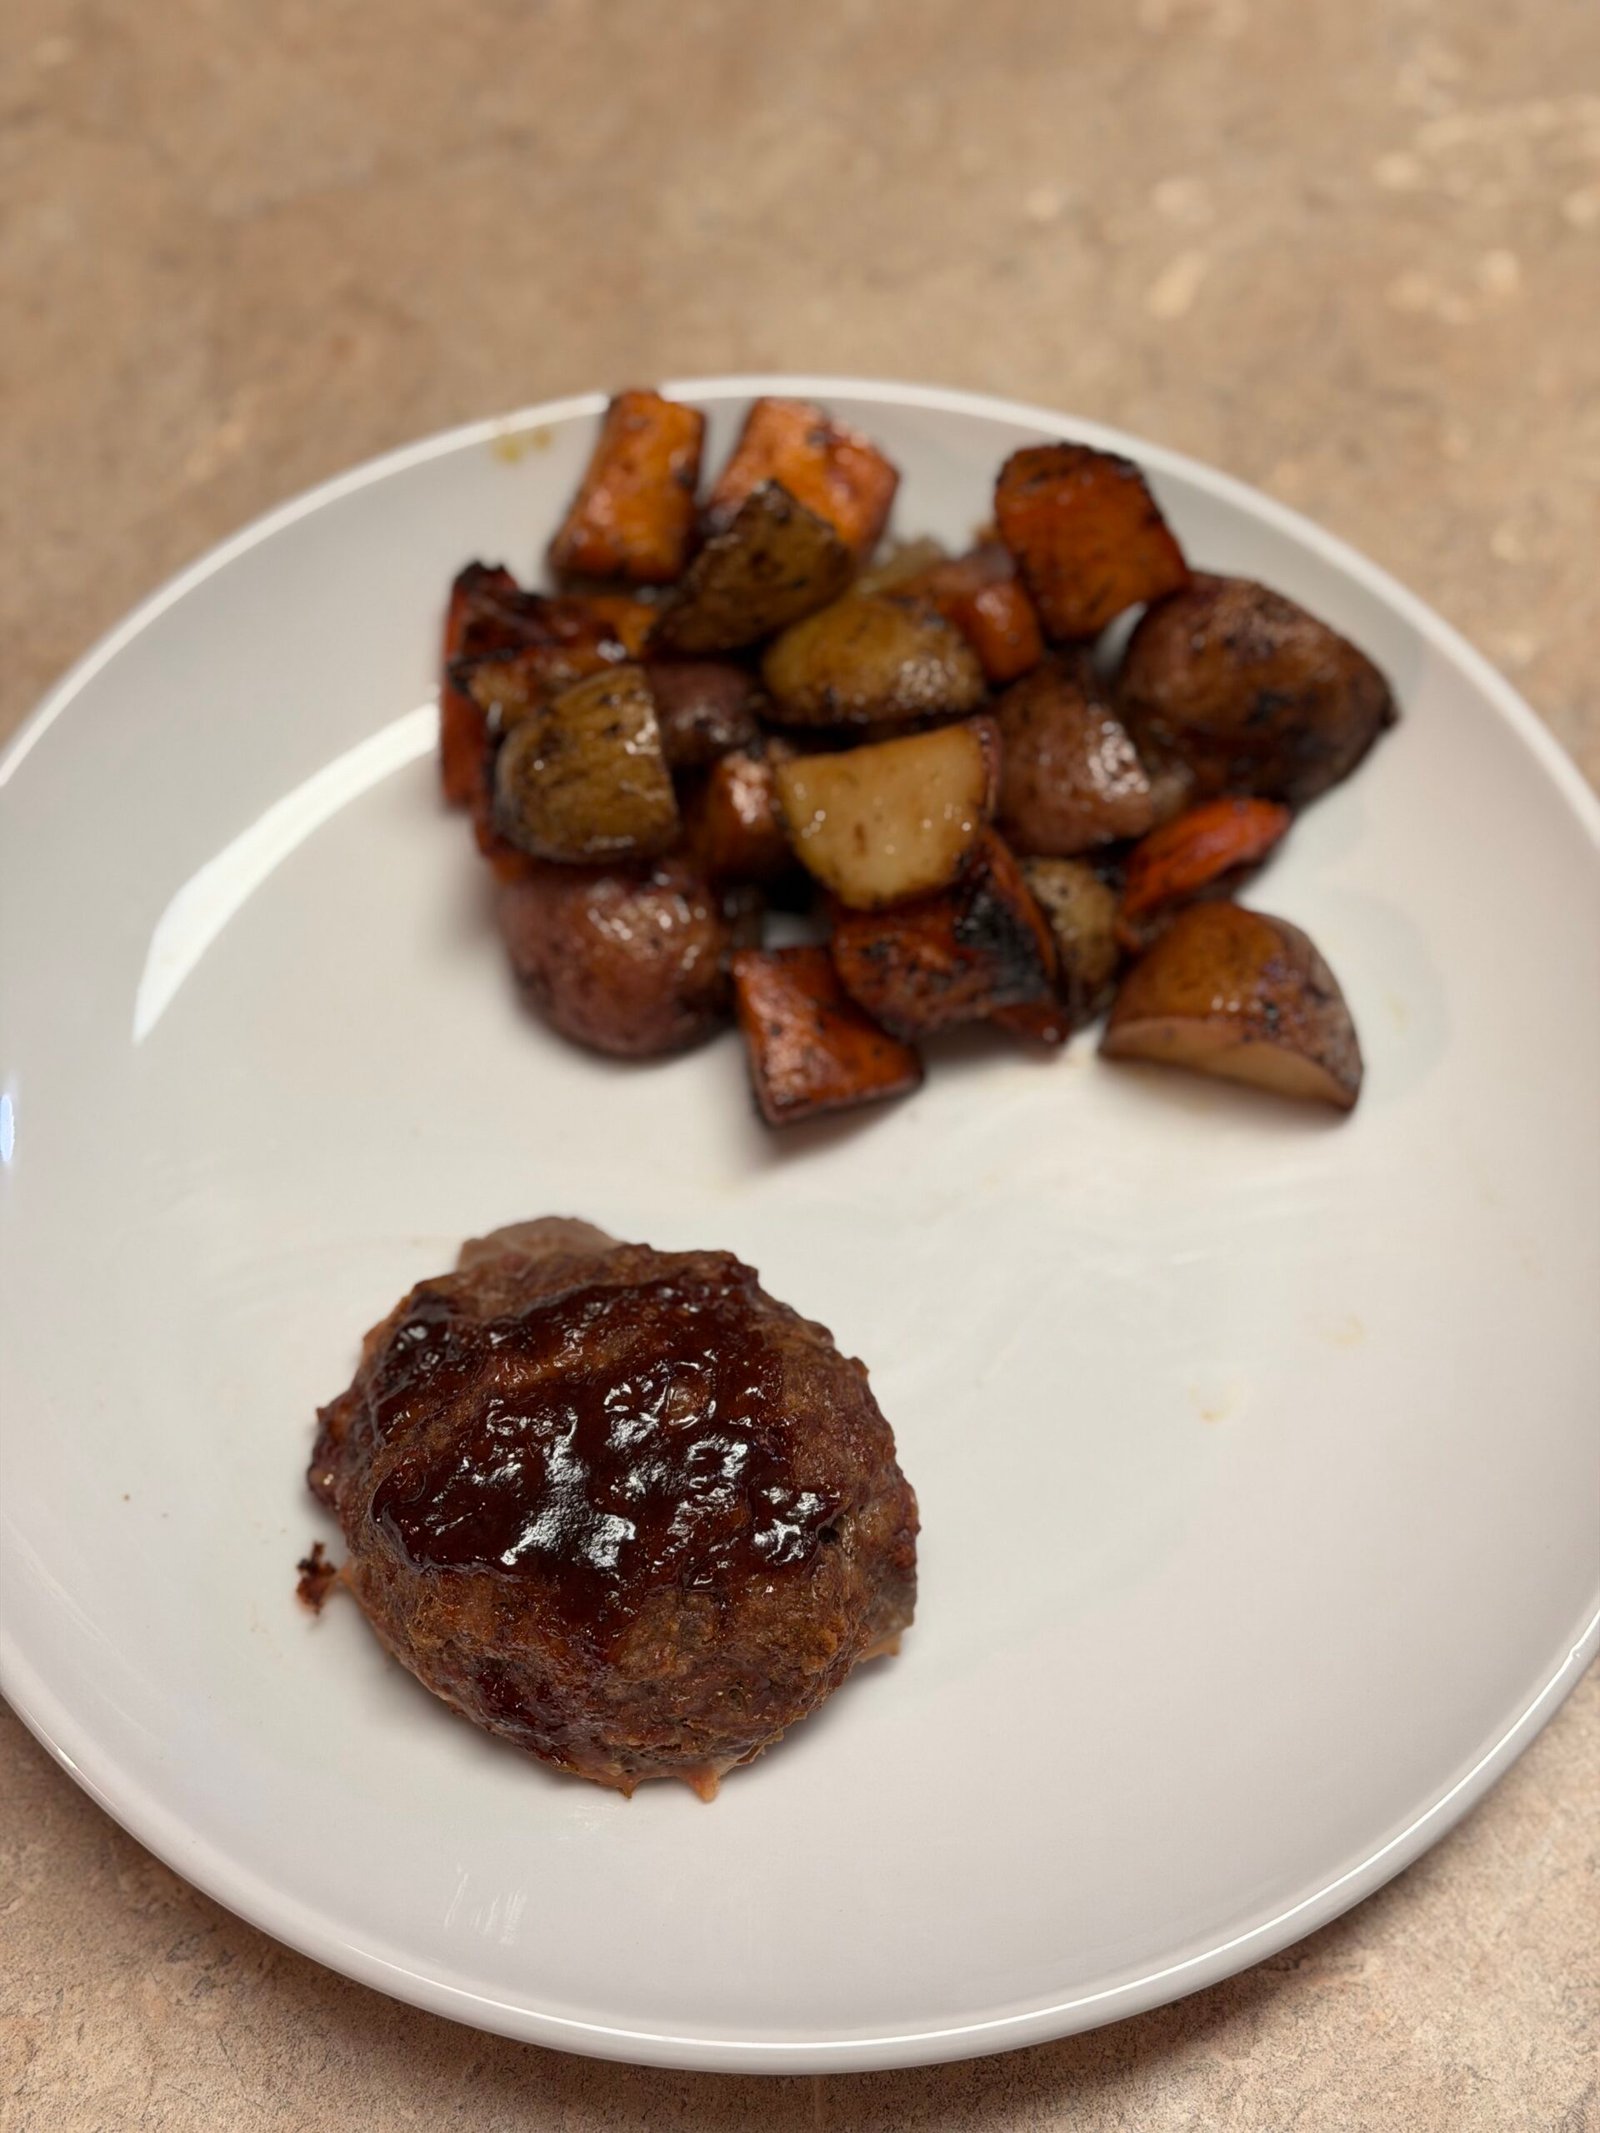
These cast iron roasted veggies are the kind of side dish that belongs at every dinner table — weeknight meals, Sunday roasts, even holiday spreads. Serve them alongside roasted chicken or pork tenderloin for a hearty, comforting plate, or pile them into a grain bowl with chickpeas and a tahini drizzle for a satisfying plant-based dinner that everyone at the table will love.
They’re also incredible the next day! Throw them into a breakfast hash with a couple of eggs and some hot sauce for a morning that feels indulgent but is actually packed with veggies. Or fold them into a warm tortilla with black beans and shredded cheese for a quick, filling lunch wrap. I love how one big batch of these stretches into multiple meals throughout the week — that’s working smarter, not harder, friends.
If you love easy veggie recipes the whole family will actually eat, you have to try my Easy Broccoli Potato Waffles — a brilliant way to sneak veggies into breakfast! My Easy Weeknight Rice Bowl pairs beautifully with these roasted veggies too — just pile them right on top for a complete, nourishing bowl. And for another crowd-pleasing veggie dish the kiddos will ask for on repeat, my Easy Lentil & Veggie Cups are always a hit!
Y’all, I hope these herb roasted cast iron veggies bring as much joy to your table as they bring to ours every single week. Drop a comment below and let me know how they turned out — and if you make them, snap a photo and tag me! I absolutely love seeing your imperfectly perfect creations. Happy cooking, friends! 🧡
Want to Save This Recipe?
Enter your email below, and we’ll send the link straight to your inbox.
Easy Herb Roasted Cast Iron Veggies Recipe
Ingredients
Method
- Preheat your oven to 450°F.
- Dice the sweet potatoes, dice the yellow potatoes, slice the carrots, and slice the onion into similar-sized pieces.
- In a large bowl, combine all the veggies. Pour in the honey and oil and toss until well coated. Add the dried parsley, thyme, rosemary, salt, and pepper, then toss again until every piece is evenly seasoned.
- Heat a drizzle of oil in a cast iron skillet over medium-high heat. Add the seasoned veggies in an even layer. Cook for 12–15 minutes, stirring occasionally, to build that golden crust on the stovetop.
- Carefully transfer the cast iron skillet to the preheated oven. Roast for an additional 15–20 minutes, or until the veggies are fork-tender and beautifully caramelized. Serve hot and enjoy!
Nutrition
Tried this recipe?
Let us know how it was!
Meet Ashleybakeseasy
Welcome to Ashley Bakes Easy! I’m Ashley, a home cook and mother who believes that delicious food doesn’t have to be complicated. My journey in the kitchen started with a simple goal: create meals that my whole family would love, we could afford on a single income, and create recipes tailored for our special needs son Winston.
LET’S CONNECT!
Hello Form Ashleybakeseasy
Welcome to Ashley Bakes Easy! I’m Ashley, a home cook and mother who believes that delicious food doesn’t have to be complicated. My journey in the kitchen started with a simple goal: create meals that my whole family would love, we could afford on a single income, and create recipes tailored for our special needs son Winston.
Leave a Reply